ADVERTISEMENT
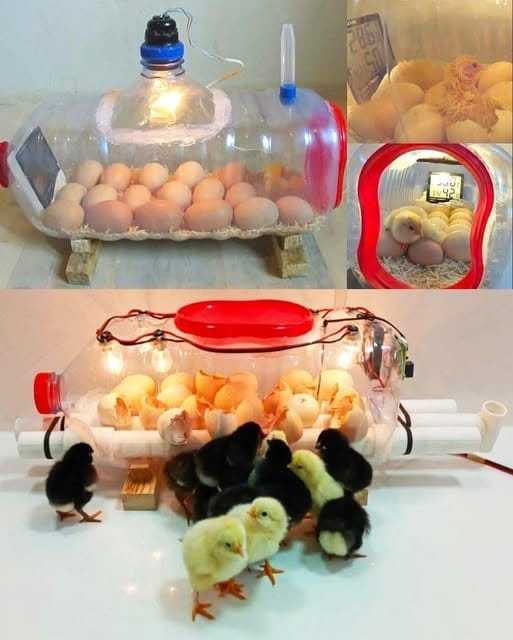
This homemade incubator is a temporary setup for hatching eggs. Keep it in a draft-free, quiet area away from direct sunlight. Make sure to monitor the conditions consistently for best results. Once chicks hatch, transfer them to a proper brooder with adequate heat and care.
Variations
Use a plastic storage container instead of cardboard for a more durable incubator.
Incorporate a small fan to improve air circulation and temperature consistency.
Use a digital thermometer with a humidity gauge for better monitoring.
Experiment with different heat sources like ceramic heat emitters or heating mats designed for reptile habitats.
FAQ
Can I use any type of water bottle?
Larger clear plastic bottles work best as they provide enough space and visibility for the eggs.
How important is humidity?
Very important. Proper humidity prevents eggs from drying out and supports healthy embryo development.
How often should I turn the eggs?
At least twice a day to avoid the embryo sticking to the shell. Stop turning eggs a few days before hatching.
What if temperature fluctuates?
Fluctuations can harm developing embryos. Aim for consistent temperature and check the heat source regularly.
How long does incubation take?
Typically, chicken eggs hatch in about 21 days.
Building this simple incubator is a rewarding project that connects you closer to nature and sustainable living. It’s perfect for beginners wanting to hatch eggs at home with minimal expense.
ADVERTISEMENT
