ADVERTISEMENT
- Prepare the Can: Make sure your can is clean and dry. Remove the top of the can completely, if not already done. The bottom of the can will act as the base of your cutter, so leave it intact.
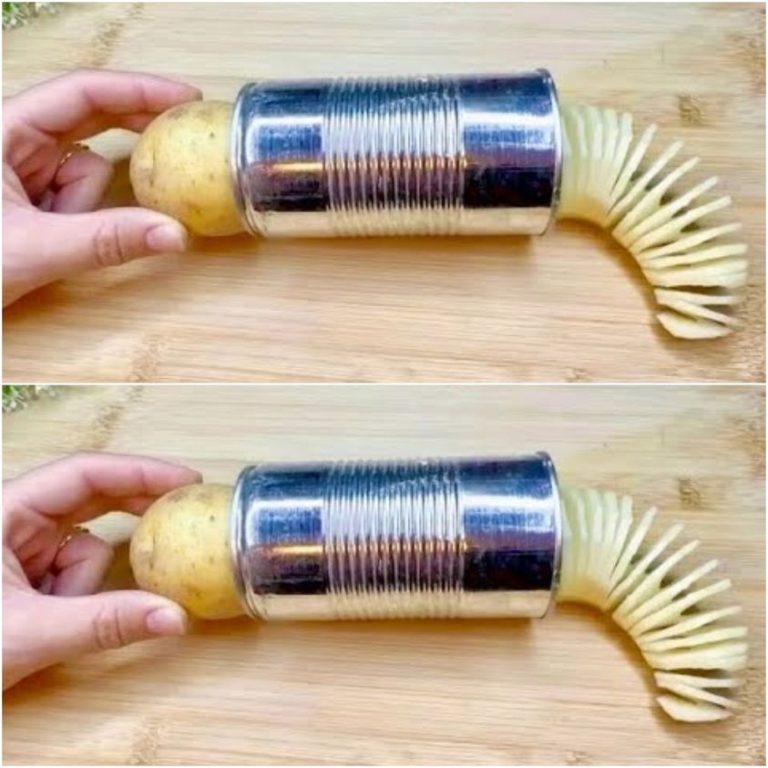
- Mark Your Cutting Lines: With your marker, draw a spiral line starting from the top edge of the can going all the way to the bottom. Think of it as a barber pole or a candy cane stripe. The width between each “stripe” will determine the thickness of your potato spirals, so adjust according to preference.
- Start Cutting: Wearing gloves to protect your hands, use the utility knife to carefully cut along the marked line. This step requires patience and a steady hand. Once you’ve cut the entire spiral, gently stretch the can to elongate the spiral cut you’ve just made. This will form the basic structure of your cutter.
- Secure Your Skewer: The metal skewer will be used to hold the potato. Make two small incisions at the top and bottom of the can (now your spiral cutter) to slide the skewer through. This setup will hold the potato in place as you spin it to create those perfect spirals.
- Spiral Away: To use, impale a potato on the skewer, then manually twist the potato while pushing it gently against the cutter. As you twist, the potato will spiral out in beautiful curls.
Enjoy Your Creation
And there you have it, your very own DIY spiral potato cutter! Perfect for making those fancy spiral potatoes you might see at fairs or food trucks. Serve them up as a fun side dish, or simply enjoy the fruits of your labor as a tasty snack. Not only have you created a handy kitchen gadget, but you’ve also added a touch of homemade charm to your cooking repertoire. Happy crafting and cooking!
ADVERTISEMENT
Pages: 1 2
